How to Make a Charcoal Sharpening Pad
Have you ever ruined a drawing because your fingers were dirty?
Charcoal is notorious for being a real nuisance to keep off your work and hands… A simple path to clean drawings is having a proper studio tool for sharpening. This article takes you through the steps of making your very own sharpening pad.
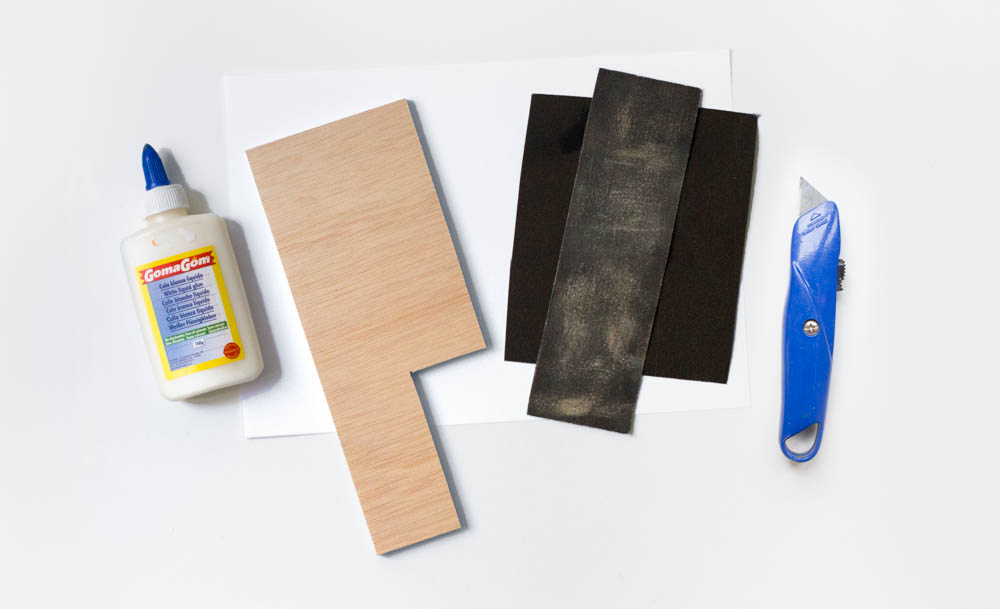
Step 1: Get Materials
- Wood glue
- X-Acto knife or scalpel (To cut the sand paper. Don’t use a fancy blade.)
- Piece of wood (Cut in a shape similar to the one pictured below.)
- Piece of sandpaper (A grit of around 200 is ideal.)
- Work surface (It might get some glue on it. Use a protective piece of cardboard/paper if necessary.)
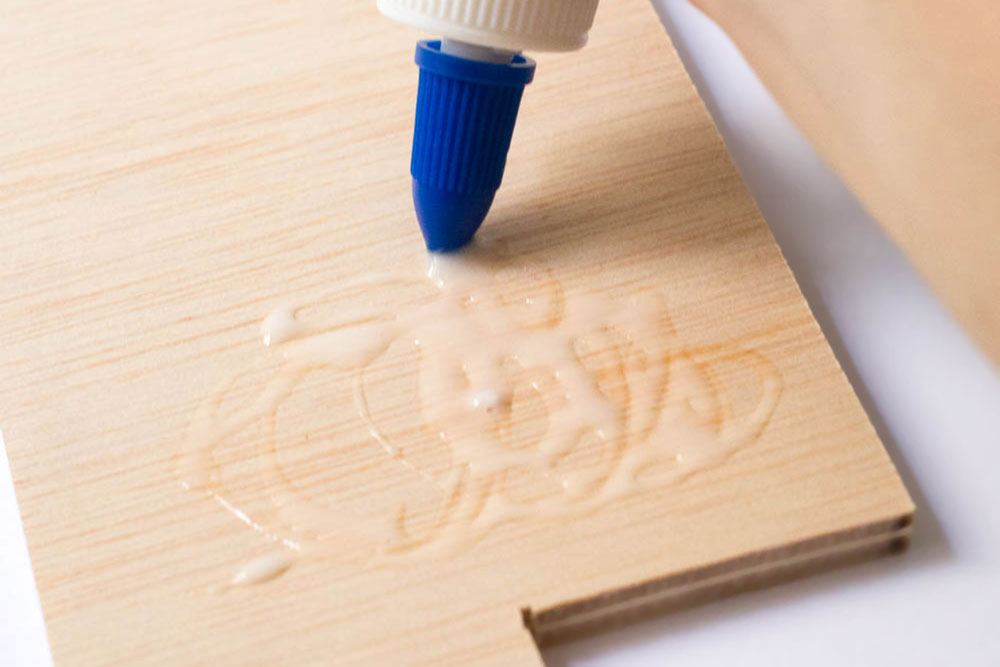
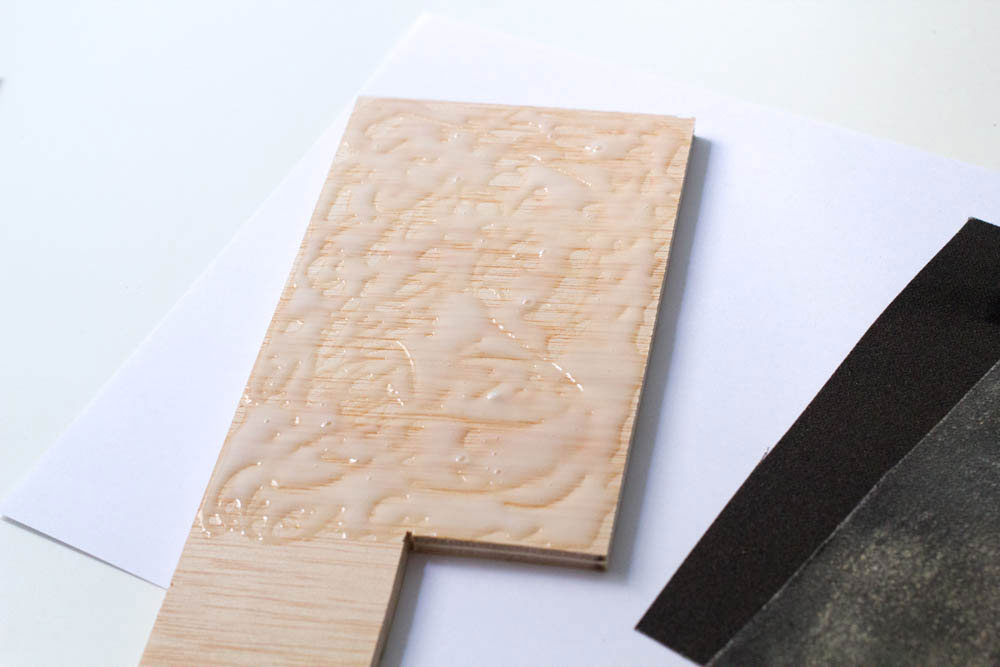
Step 2: Apply Glue to Wood
Be generous with the glue. Spread it across the entire surface except for the thin part of the wood. This will become the handle.
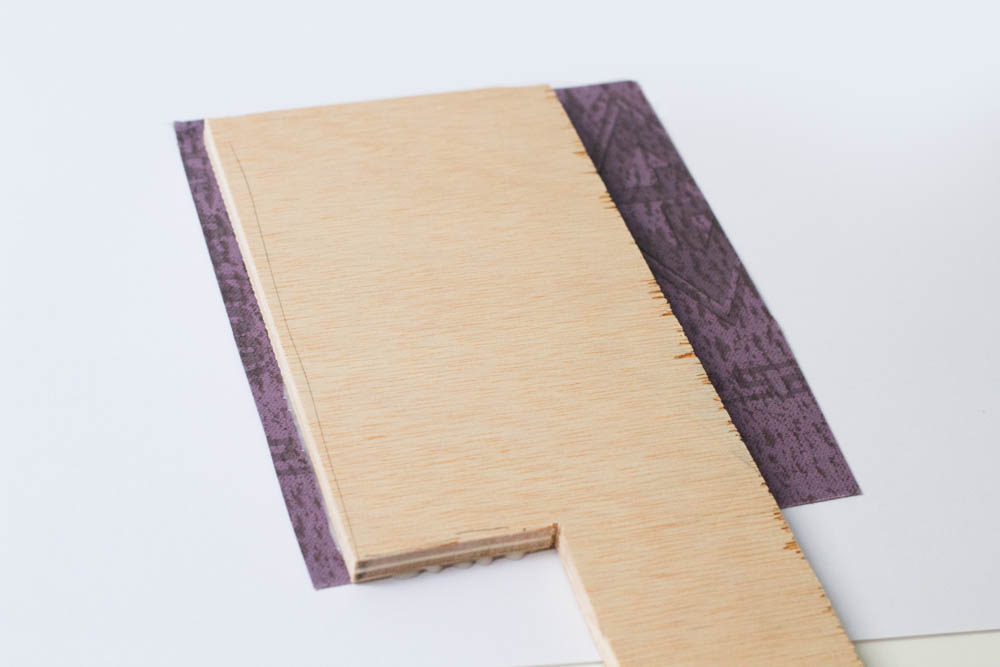
Step 3: Glue Sandpaper to Wood
At this stage, some of the glue might get on your work surface. I’m using a piece of paper to protect my table. Put your piece of wood down onto the sandpaper – glue facing down. Holding the sandpaper in place, slightly wiggle the two against each to remove air bubbles. Remove excess glue that may squeeze out from the sides.

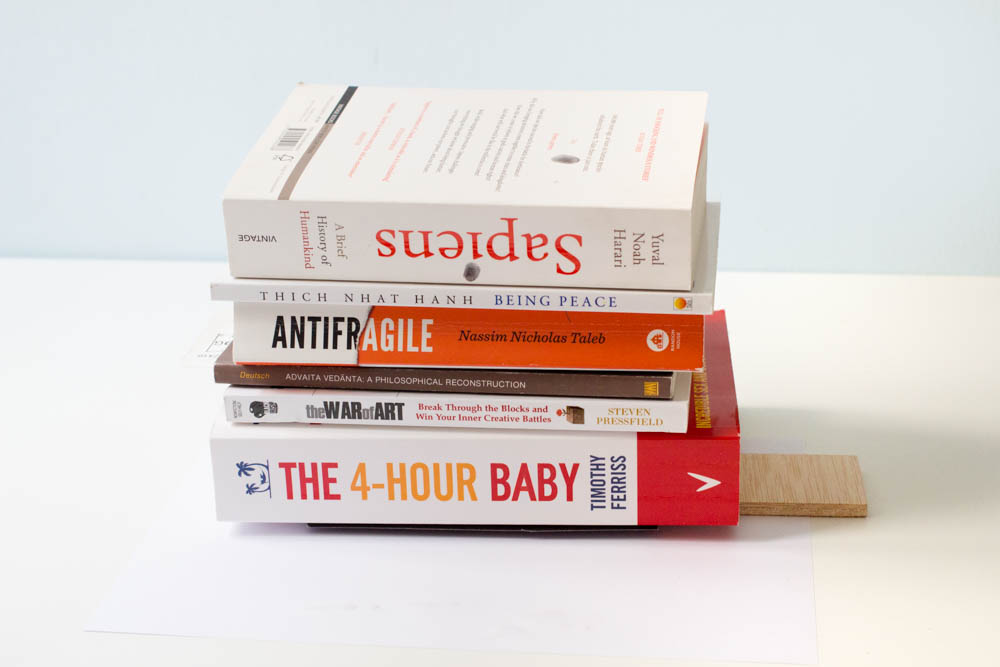
Step 4: Press
To create a strong bond, put a heavy object on top of the wood while the glue dries. Wait at least 20 minutes. Longer is better, even up to a few hours if you are in a cold or moist climate.
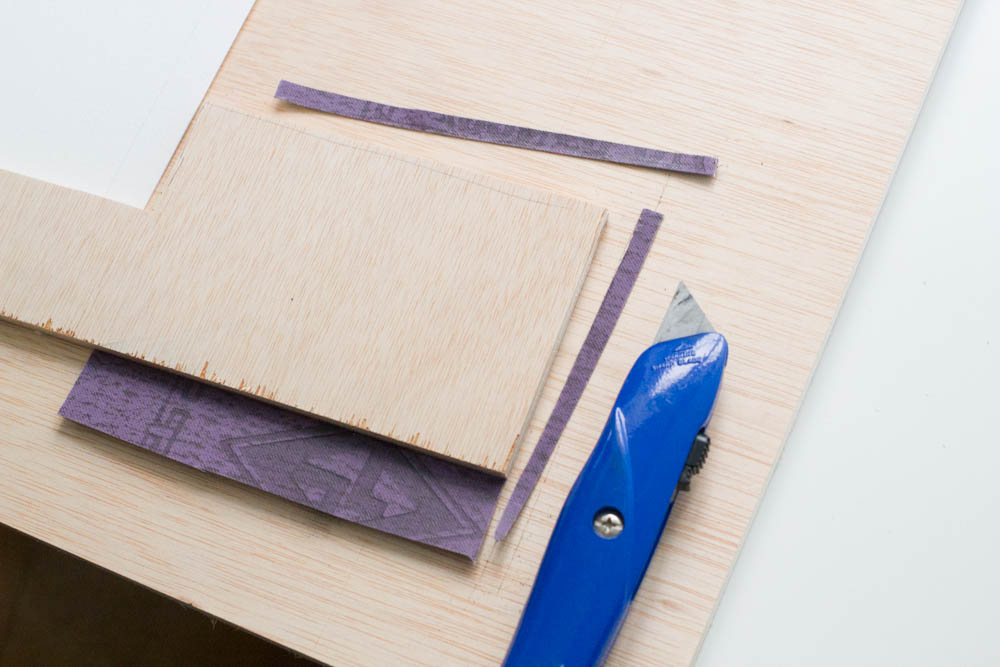
Step 5: Trim Sandpaper
When the glue has fully dried, you can take off the weight and cut the sandpaper to the size of your sharpening pad. Doing this now instead of at the beginning will give you a perfect fit!
Voilà!
Done. Congratulations, you are now the proud owner of a sharpening pad! 🙂
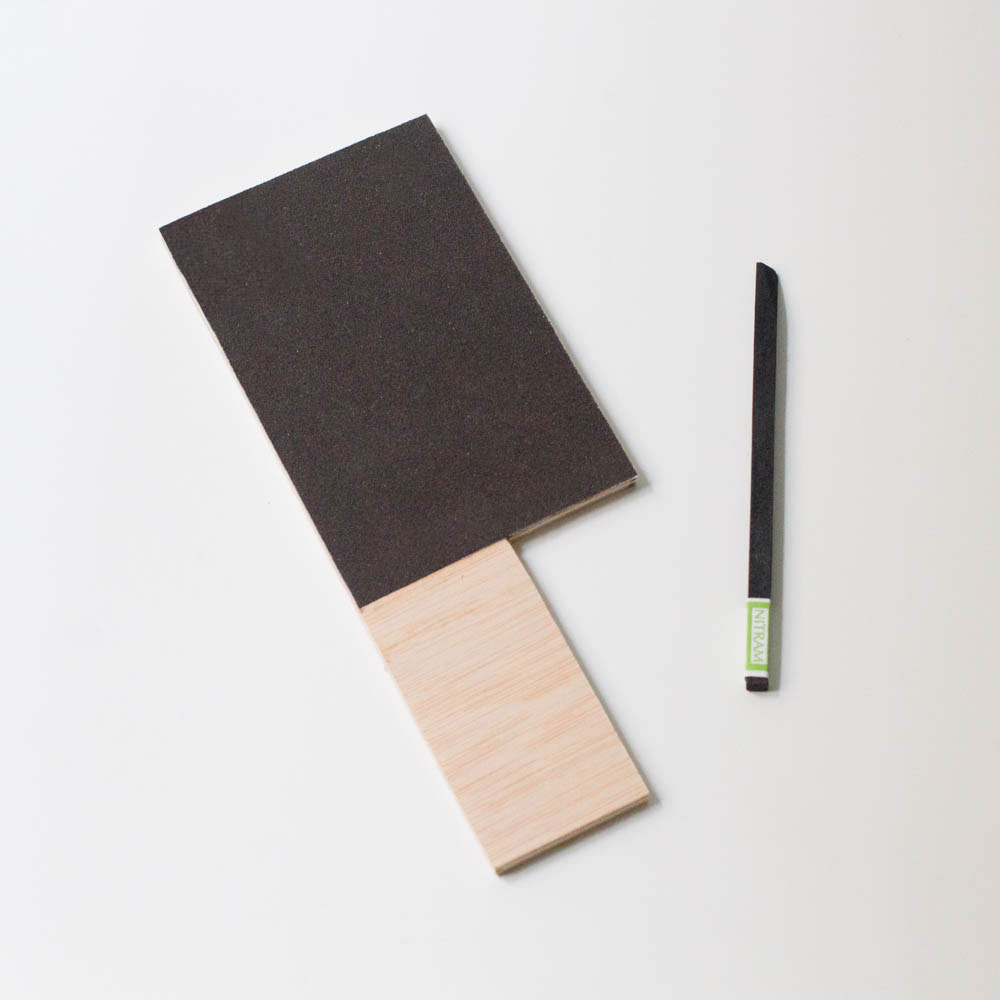
PS. If you’d like to see what can be done with charcoal, here are some of my figure drawings, and here some of my cast drawings. I teach how to do this at Barcelona Academy of Art.
Courses