Learn to Draw – Challenge 2: Value Scale

There are many paths to drawing mastery.
If you want realism in your work, you need to master seeing values and controlling your medium. That’s what the Value Challenges are all about. This is how I train artists from all over the world at Barcelona Academy of Art.
Join the challenges and become a more sensitive and skillful artist:
Value Challenge 1: Value Gradient (click here)
Value Challenge 2: Value Scale (you are here)
Why a Value Scale?
Somebody might have already told you to make a Value Scale. Perhaps you got excited about it and genuinely wanted to do it. But maybe you thought “that’s boring, and a waste of time”.
Consider all the images you are going to make in the future. Values are essential for all of them. If you make a value scale even once, my experience is that it will give you more confidence, save you countless hours of work, and make your drawings better.
I recommend doing at least one Value Scale for every medium you work in. The ideal moment is when you first encounter a new medium, but many experienced artists still practice with Value Scales to keep their eyes sharp. If it’s good enough for them, it’s surely good enough for us!
Here is my invitation to you to take on the Value Scale challenge. Ready? Let’s do this.
How to make a Value Scale
A) Gather materials
- A soft pencil (I like a 2B)
- A hard pencil (2h works well for me)
- A kneadable eraser (if you can’t find one, work more slowly and carefully)
- A ruler (you can also use the edge of a book)
- A piece of paper (sketch paper will do, but the nicer the paper the better)
B) Things to keep in mind
- Working carefully and with clean hands you will finish much quicker than trying to rush.
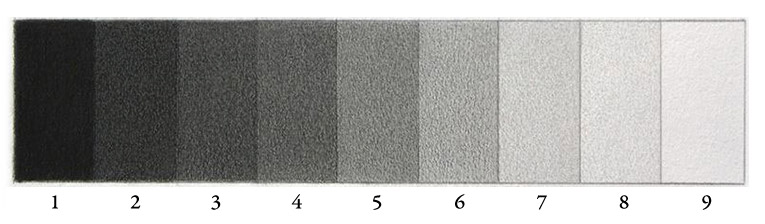
- Keep the tones very smooth (free of texture/noise) so you can see the value identity of each step. (See this article.)
- When it’s finished, the contrast between all steps must be evenly distributed.
- This will take time. Expect to invest at least 3 hours. Maybe even 6 hours or 9 hours, if you take it to a high degree of finish, which I recommend.
The 6 Step Process
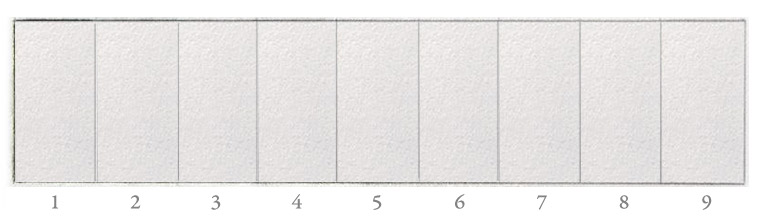
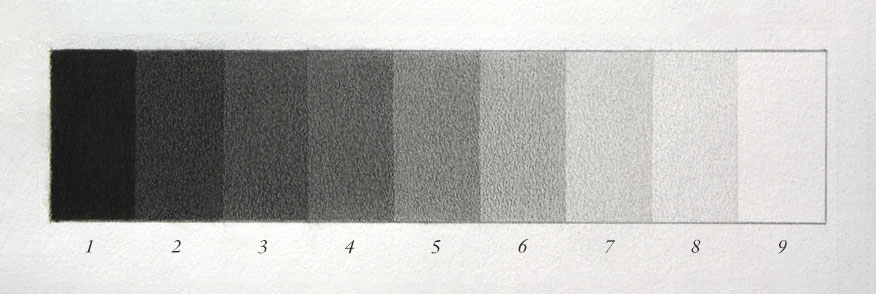
1) Draw the scale
Use light lines. Make 9 steps. If this is your very first Value Scale, you can do one with 5 steps.
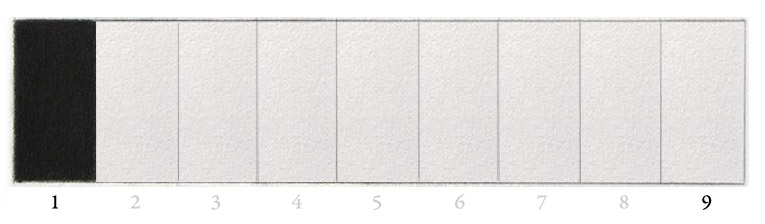
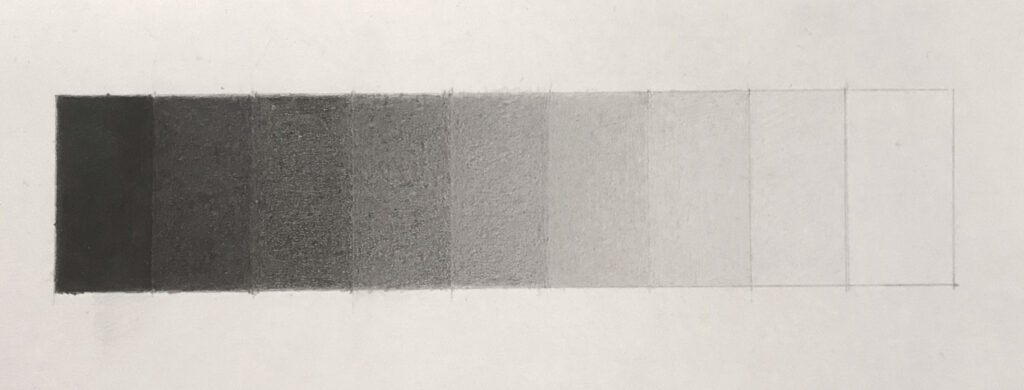
2) Begin with the extremes
The most common mistake I see is students trying to make a Value Scale “from left to right”.
You will get much better results by starting with the ends of the spectrum: 1 and 9.
Go as dark as your pencil allows on 1 and leave 9 empty (just the paper).
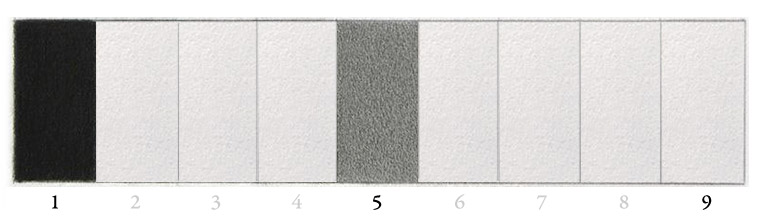
3) Find the center
Add the missing tone in the middle: 5. It won’t be perfect, but get as close as you can. Keep the tone even!
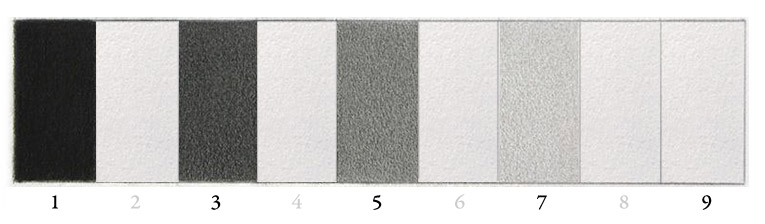
4) Find the center again
Add the missing tones in the middle: 3 and 7. Adjust 5 if you need to.
5) Add the final tones
Add 2, 4, 6, 8 to complete the scale.
6) Rebalance
Finish the scale by evening it out where necessary. A very effective strategy is to identify the biggest “jump” between two tones. Here that was between 6 and 7. I darkened 7 slightly, lightened 4 a bit, and made 5 more even. Done!
Click the arrows to see a “before and after”.
Common Mistakes
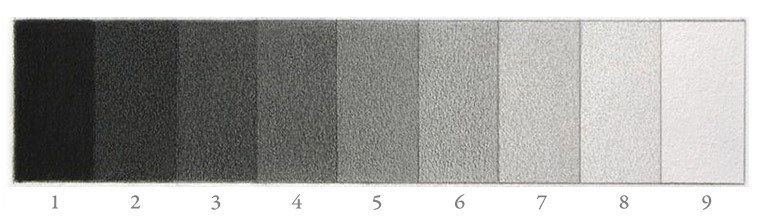
1) Noise
❌ Do not rush and create a messy tone. If your drawing is noisy, you won’t be able to tell what value each swatch is.
✅ Do create smooth tones. Here’s an article on how to do this.
2) Outlines
❌ Do not draw dark or thick outlines between each value step.
✅ Do draw a subtle outline around the contour of the scale. This helps separate the light tones from the paper.

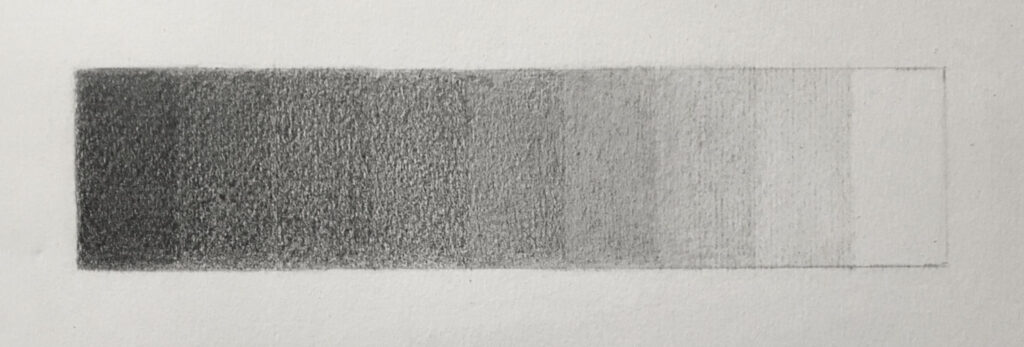
3) Blurred Boundaries
❌ Do not create soft edges or blurry transitions between value steps.
✅ Do create razor-sharp transitions. This is one of the main points of this exercise. If you cannot make two tones meet with a sharp edge on a value scale, you won’t be able to do it in a portrait, for example around the eyes. Again, you’ll need sharp pencils for this.
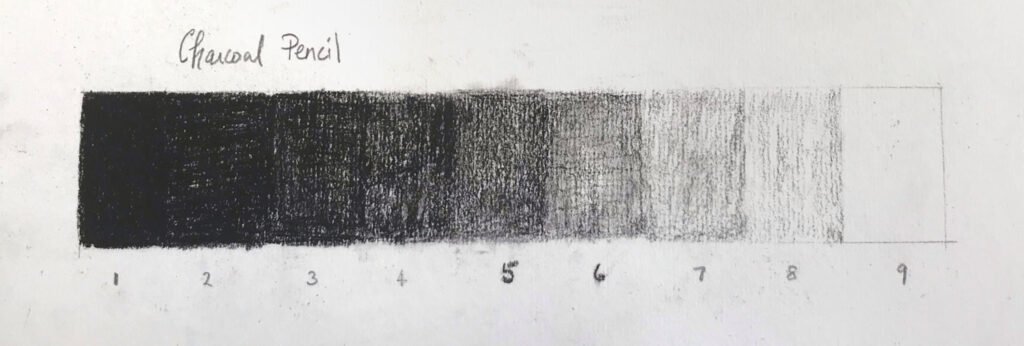
Good Examples
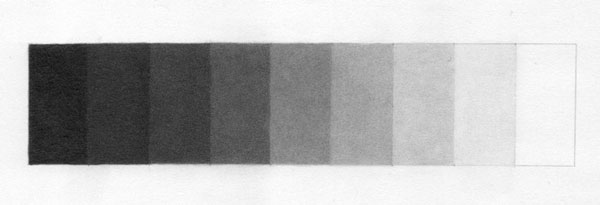
Your turn
It’s your turn! Make a Value Scale now!
Share it on Instagram or Facebook with the hashtag #valuescalechallenge so we can all learn together 🙂
Also, if you haven’t done it yet: here is the Value Gradient Challenge.
10 thoughts on “Learn to Draw – Challenge 2: Value Scale”
Courses
dosnt seem hard
Hehe yeah. Give it a go!
Thanks for the lesson ! Great informations.
I’d like to know how you can go that dark ( #1) with a 2B pencil ?
Thanks Dorian
PS : Seems like i’ll go for your shading course pretty soon 🙂
Hi Sathy!
The paper type is an important factor in how dark I can go. I like to recommend Canson Mi-Teintes because it’s fairly widely available and has enough tooth but not too much. The darkest tone in this example may come from a softer pencil than a 2B. The softer a graphite lead, the more sheen it will produce. That’s something I generally work to avoid, either by limiting myself to a 2B pencil or by using a carbon pencil or conté for the darkest tone. The downside with both of these is that I find them more difficult to keep sharp and produce a smooth tone.
Hi Dorian
Thanks a lot for your reply.
I’ve been experimenting these last days some bristol paper and it works great at getting very soft ans smooth tone. What do you think about bristol papers ?
I’m getting today your shading course ! Can’t wait to start the journey with you !
Best
Sathy
Yes, I like bristol paper, too!
Exciting! May you enjoy the course and may it serve you well 🙂
I’ve done this in the past on paper and will most likely do it again. Just wondering if there’s any point in doing this digitally, since you can just pick a different value on the colour wheel.
Do you think there’s benefit to maybe doing it for a particular brush I am using in photoshop or doing it for each brush that I’m using separately?
Hi Gavro,
Yes, I think it is useful to also do the value scale digitally if you have a way to choose your values organically, meaning not on a visual color picker. For example, you could color-pick from a random grayscale photograph, or paint some random values with transparency.
For the value gradient, you could do a digital version where you test different looks and workflows. There are gradients everywhere in representational art, and you’ll benefit from having a fluid path to creating the type of gradient you want.
Such a wonderful information. Thanks a lot. U r really a great person with golden heart.
Thank you, Manoj 🙂