Learn to Draw – Challenge 1: Value Gradient

There are many paths to drawing mastery.
If you want realism in your work, you need to master seeing values and controlling your medium. That’s what the Value Challenges are all about. This is how I train artists from all over the world at Barcelona Academy of Art.
Join the challenges and become a more sensitive and skillful artist:
Value Challenge 1: Value Gradient (you are here)
Value Challenge 2: Value Scale (click here)
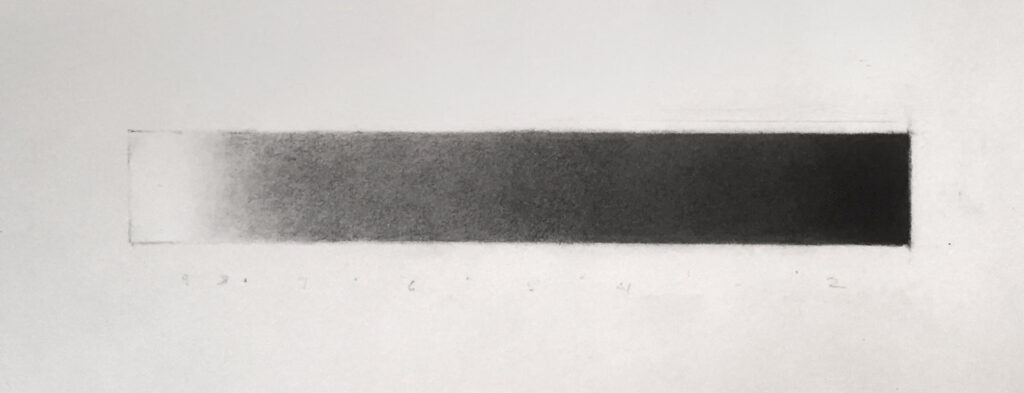
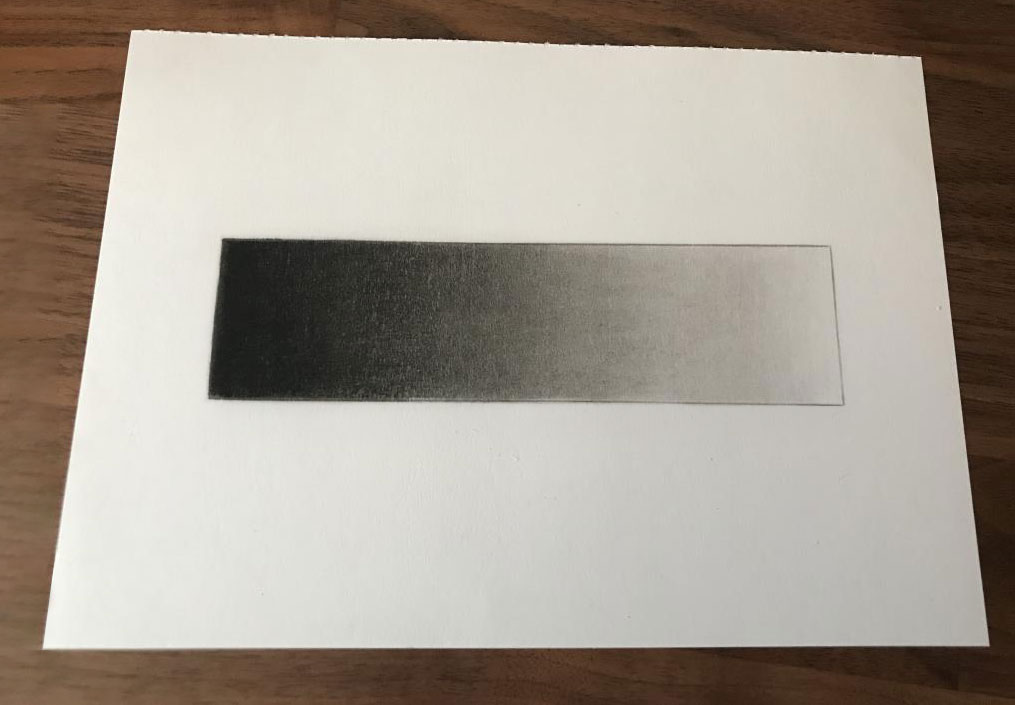
Why a Value Gradient?
Most people are familiar with Value Scales. A Value Gradient is similar, but it’s less about controlling values and more about controlling your medium. Therefore, it makes sense to do a gradient first. The specific skills you will improve are edge control, value control, and creating smooth tones. This is extremely valuable in realistic drawing and will allow you to avoid or resolve many drawing problems.
I recommend doing at least one Value Gradient for each medium you work in. It’s ideal to do it when you first encounter a new medium, but it’s helpful at any skill level. Many experienced artists still use Value Gradients to maintain their craftsmanship. If it’s good enough for them, it’s surely good enough for us, right?
Here is my invitation to you to take on the Value Gradient challenge. Ready? Let’s a-go!
How to make a Value Gradient in Charcoal
A) Gather materials
- A soft charcoal (I like the soft green Nitram vine charcoal.)
- A hard charcoal (The blue Nitram for me.)
- A kneadable eraser (This is pretty much indispensable when working in charcoal.)
- A ruler (You can also use the edge of a book.)
- A piece of paper (You need a proper drawing paper, around 160 gsm (98 lb). Canson Mi-Teintes, Fabriano Roma, or Arches works well.)
B) Things to keep in mind
- Working carefully and with clean hands, you will finish much quicker than trying to rush.
- Keep “cleaning up” your gradient as you work, so it is free of texture/noise, and you can see the values clearly.
- This will take time. Expect to invest at least 2 hours. Maybe even 4 hours or 6 hours, if you take it to a high degree of finish, which I recommend.
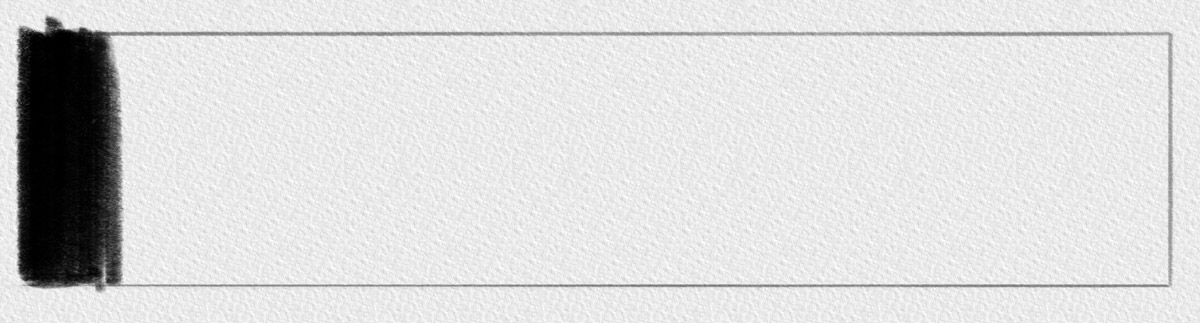
1) Draw a box
Use light lines to indicate the shape of your gradient.
2) Start with black
Place your “darkest dark” on the left side of your gradient.
The far right represents your “lightest light”, the paper value.
3) Find the middle value
Add a tone in the center that you estimate as the middle value between “darkest dark” and “lightest light”.
It won’t be perfect, but get as close as you can.
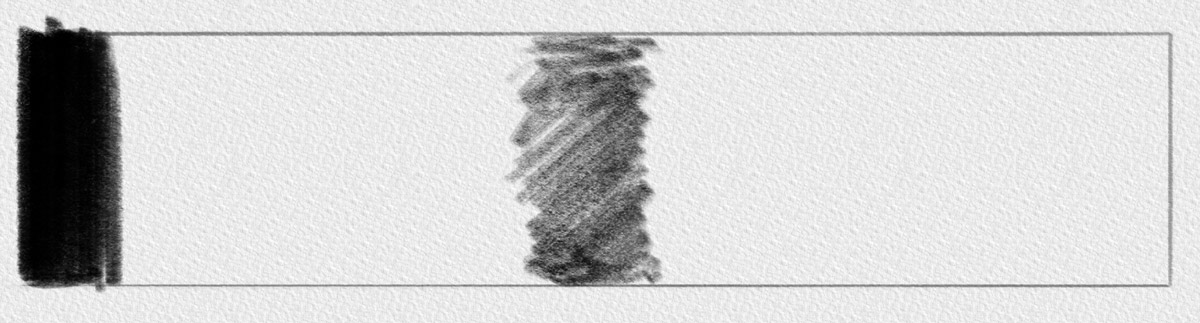
4) Begin the Gradient
Grow out from black towards the middle value. Adjust with your eraser if necessary.

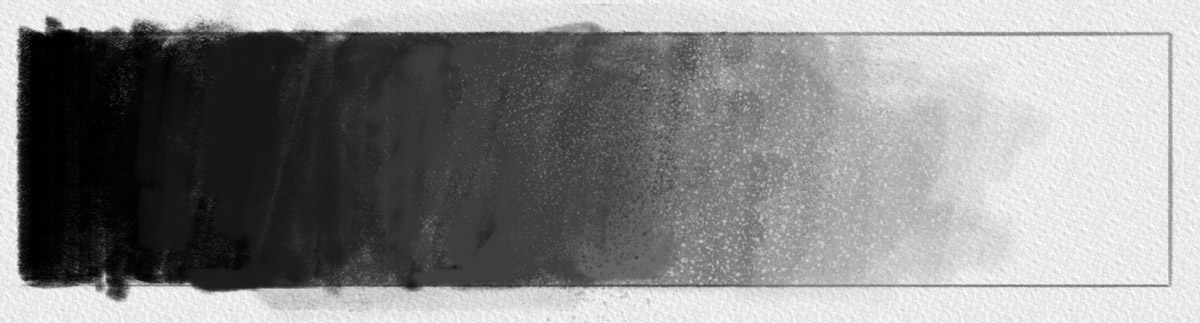
5) Rough Gradient
Keep expanding to create a rough version of your gradient. Is it well balanced overall?
6) Refine
Clean up the tones to make a smooth transition from left to right. (See how to create smooth tones.)
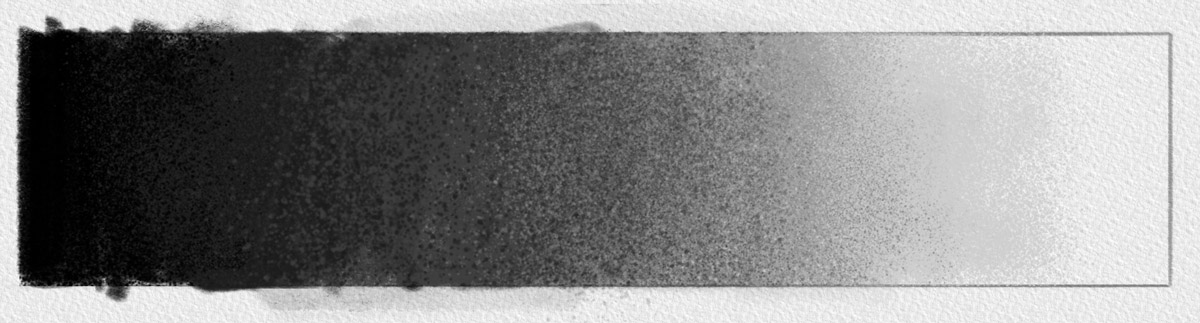
7) Finish
Finish the scale by cleaning up any final irregularities. This can take a while! Be patient and really go for perfection.

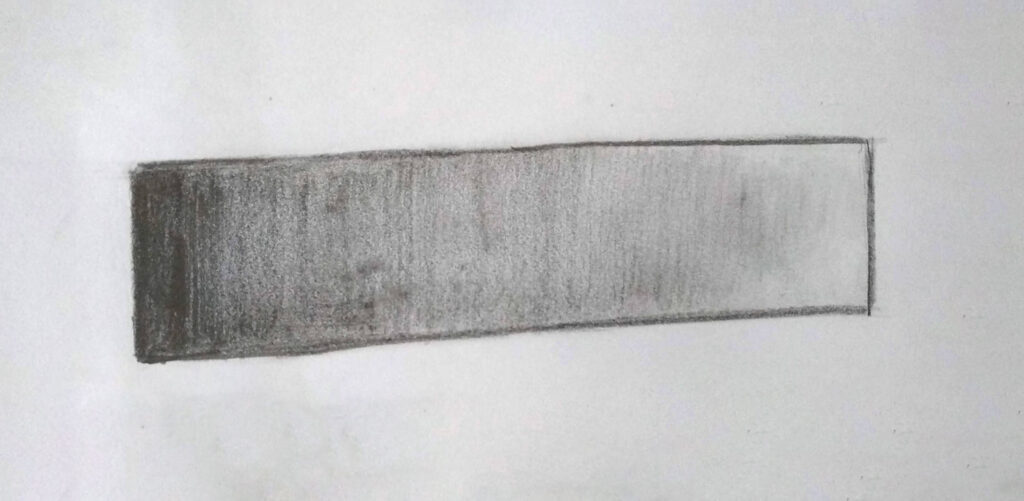
Common Mistakes
1) Noise
❌ Do not rush and create a messy tone because it will limit how clearly you see the values.
✅ Do create smooth tones. Here’s an article on how to do this.

2) Out of Balance
❌ Do not make the gradient too dark or too light overall.
✅ Do keep it balanced.
3) Dark Outline
❌ Do not draw dark or thick outline around the gradient. It’s distracting.
✅ Do draw a subtle outline around the contour. This helps separate the light tones from the paper.
Good Examples

Your turn
Now it’s your turn! Make a Value Gradient!
Share it on Instagram or Facebook with the hashtag #valuegradientchallenge so we can all learn together 🙂
When you’re done, do the Value Scale Challenge next.
Courses